2-min read
This guide will show you how to change a Jupyter cell to be in Markdown mode.
In fact, you’ll learn how to change a cell to any of the three modes in a Jupyter notebook (Code, Markdown, Raw).
Let’s get into it.
There are two ways to change the mode of a cell:
- Using your cursor
- [Faster] With a keyboard shortcut
1. Using your Cursor to Toggle Between Modes
Here’s how:
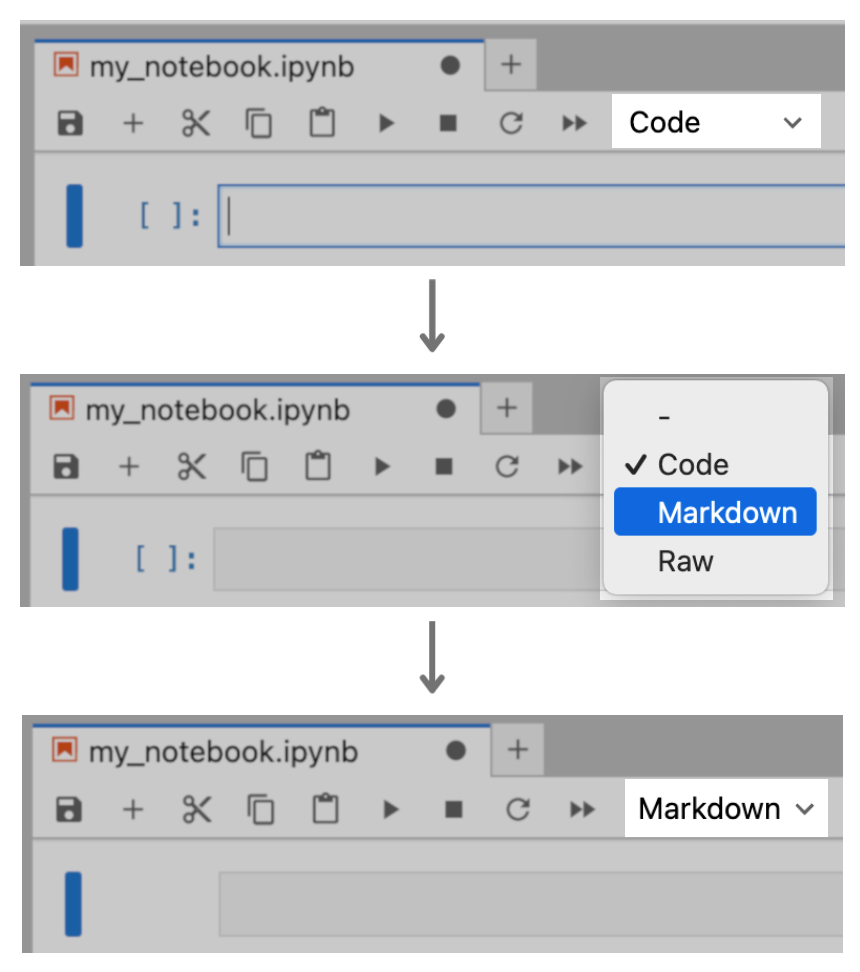
→ Select the cell (you can tell it’s selected if there’s a blue border around it)
→ Look for the drop-down menu at the top of the notebook that says Code ∨. Click it
→ The drop-down menu will open with three options: Code, Markdown, Raw
→ Click the mode you want
Here’s how it looks:
This way works fine, but there’s a faster way to change the cell mode: Using a keyboard shortcut ⌨️⚡.
2. Using a Keyboard Shortcut to Toggle Between Modes
Here’s how:
→ Select the cell
→ If you want to change to…
- … Code: press Y on your keyboard
- … Markdown: press M on your keyboard
- … Raw: press R on your keyboard
It’s as simple as that. Now you know two ways to quickly change a cell to Code, Markdown or Raw modes in a Jupyter notebook, using either your cursor or a keyboard shortcut.
💡 Like keyboard shortcuts? Check out this useful resource for more keyboard shortcuts in Jupyter.